
Download Aethersx2 BIOS [Official Updated File 2026]
Many gamers download the AetherSX2 emulator to play PlayStation 2 games on their Android devices, but then get stuck. The emulator is installed, the game is ready, but nothing works.
Because without the AetherSX2 BIOS, your emulator can not even start. It is like having a game console with no power button. That is where most players get confused or give up.
In this guide, I will tell you all the steps to help you to safely download AetherSX2 BIOS and get your games running smoothly in minutes.
What is AetherSX2 BIOS?
AetherSX2 BIOS is a small but important file that makes the AetherSX2 emulator work like a real PlayStation 2. BIOS stands for Basic Input Output System, and it helps the emulator to understand how a PS2 normally runs games.
The emulator will not know how to start or play your games, no matter what settings you change, without this file. It is like the brain of the PlayStation 2 inside your Android device. You need the PSx2 BIOS to make everything run in the right way, just like the real console.
Types of PS2 BIOS Versions
There are different types of PS2 BIOS. Because PlayStation 2 was released in different countries, so it has different BIOS versions based on region. Each version works best with games from that region. I will discuss some common types here:
- USA (NTSC-U) BIOS
This BIOS version is made for PlayStation 2 consoles sold in the United States and Canada. If you want to play NTSC-U games, which are made for North America, then this is the right BIOS file to use.
- Europe (PAL) BIOS
The PAL BIOS version is used in Europe, Australia, and some parts of Asia. Games that are made for this region are in PAL format, which runs at a different screen rate compared to NTSC. If your games are labeled PAL, then you need this BIOS.
- Japan (NTSC-J) BIOS
This version is built for Japanese PS2 consoles. It supports those games which released only in Japan. If you are a fan of Japanese-exclusive PS2 titles or like to play games in Japanese, then this BIOS version is for you
- Asia BIOS (NTSC-C)
This BIOS version supports PlayStation 2 consoles released in some Asian countries outside Japan, such as Hong Kong and Taiwan. It is less common but still useful if your games are in the NTSC-C region format.
Why Do You Need a BIOS for AetherSX2?
You need a BIOS for AetherSX2 because the emulator can not run without it. The BIOS acts like the startup system of a real PlayStation 2 and tells the emulator how to load and play games correctly.
AetherSX2 will not know how to behave like a PS2, and your games will not start at all without this BIOS file. Once you add the right PlayStation 2 BIOS file, then your emulator will work just like a real console.
Features of AetherSX2 BIOS
The AetherSX2 BIOS is not just a random file, infact, it plays an important role in giving you a smooth and real PS2 gaming experience. When you load the PS2 emulator BIOS into your emulator, then you may unlock many useful features. You may get these features:
Real PS2 Boot Screen
You will get the classic PlayStation 2 startup screen just like the original console. It brings back memories and makes the emulator feel more real.
Faster Game Loading
You will notice your games load quicker and more smoothly. The BIOS helps the emulator to handle game files better, so you do not have to deal with long wait times or crashes
High-Quality Graphics
AetherSX2 for Mac latest version, improves the look of PS2 games on your Mac. It allows you to upscale graphics up to 1080p or even 4K if your device can handle it. This means old games like Tekken 5 or Resident Evil 4 look sharper, brighter, and more detailed.
Easy Controller Support
You can easily connect PS4, PS5, or Xbox controllers to your Mac. It will detect them on its own, so no extra setup is needed. This gives you a console-like experience while playing on your MacBook or iMac.
Accurate Game Controls
You also get better control settings that feel like a real PS2. This means your controller or touchscreen works more smoothly with each game.
Memory Card Support
You can save and load your game progress, just like on a real PlayStation 2. The BIOS allows the emulator to read and write memory card data properly.
Game Region Support
You are able to play games from different regions, like the USA, Japan, or Europe. This gives you more options to explore games worldwide.
Stable Gameplay
You will face fewer glitches, bugs, or game freezes. The BIOS keeps the emulator stable, so you can enjoy long gaming sessions without problems.
Common Issues & Fixes
I know the this emulator latest version is a powerful PS2 emulator, but some users face small problems while using it. I will share those common problems here and their solutions also:
Game Lags or Runs Slow
If your game is lagging or running slowly, then it might be because your device is not powerful enough or the settings are too high.
Fix:
- Go to settings and enable “Fast Boot”.
- Turn off Blending Accuracy or set it to “None”.
- Lower the resolution under Graphics > Rendering Resolution.
- Try to turn on “Frame Skipping” if needed.
Game does not load or Crashes
Sometimes a game might crash when you open it. This mostly happens if the BIOS is missing or the game file is corrupted.
Fix:
- You should check that you have added the PS2 BIOS file correctly.
- Try to use a different ISO or BIN file of the game.
- Do not load compressed files before extracting them first.
No Sound or Broken Audio
If the game has no sound or the audio is broken, then it could be due to bad settings or a heavy game.
Fix:
- Go to Audio Settings and change the Audio Latency to “Safe” or “Low”.
- Reduce the emulation speed if you hear crackling sounds.
- Try to use headphones for better sound quality.
Controls Not Working
Sometimes the on-screen or external controller does not work.
Fix:
- Go to Controller Settings and check that your controller is selected.
- If you use Bluetooth, then reconnect the controller and restart the app.
- Customize the on-screen buttons if needed.
Black Screen on Game Opening
If the game opens but only shows a black screen, then it could be a settings or game file issue.
Fix:
- Use a different graphics renderer like OpenGL or Vulkan in the settings.
- Check if the game file is complete and not corrupted.
- Restart the app and try again.
Save/Load State Not Working
You might face problems while saving or loading your game state.
Fix:
- Check that you are using the right version of the game.
- Do not use save states from different versions or platforms.
- You should try to use the in-game save option instead of quick save or load.
How to Get BIOS for AetherSX2?
If you want to make your AetherSX2 work, then you need to add a PS2 BIOS file. But it is important to get the BIOS safely. The best and most legal way is to dump the BIOS from your own PlayStation 2 console.
- Use a Real PS2 Console
First, you need access to an actual PlayStation 2 console. The BIOS file comes from the hardware of your PS2, so you can not create one without it. If you do not have a PS2, then you can download the BIOS file from our website. I will tell you the next steps for getting BIOS from the PS2 console.
- Get a USB Drive and a Free McBoot Memory Card
Once you have your PS2, the next step is to get a USB flash drive and a Free McBoot memory card. Free McBoot is a special memory card that allows your PS2 to run homebrew apps. Insert the FMCB card into your PS2 and plug the USB drive into one of the ports.
- Download and Install BIOS Dumper Tool
Now, you will need a tool like “BIOS Dumper” or “uLaunchELF.” Download this tool on your computer and copy it to the USB drive. This tool helps you to extract the BIOS file directly from your PS2 system.
- Run uLaunchELF on Your PS2
After copying the dumper tool to your USB, plug the USB back into your PS2. Turn on your console with the Free McBoot memory card inserted. You will see the uLaunchELF menu. This is a special menu that allows you to run apps from the USB.
- Dump the BIOS File to USB
Open the BIOS dumper from your USB and follow the on-screen instructions by using the uLaunchELF menu. It will scan your PS2 and create a BIOS file. This file will be saved on your USB drive. This is the most important step, because when you are done with it, then you will get a real PS2 BIOS.
- Transfer the BIOS to Your Android Device
Now remove the USB from your PS2 and plug it into your computer or phone. Find the BIOS file, which is mostly named something like SCPH10000.BIN or SCPH39001.BIN, and move it to a folder on your Android device that you can easily access.
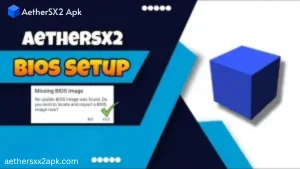
- Load the BIOS into AetherSX2
After transferring the BIOS, open the AetherSX2 app on your Android device. Go to settings and tap on “BIOS.” Then, find the folder where you saved the BIOS file and select it. The emulator will now recognize it.
- Start Playing PS2 Games
Once the BIOS is loaded, AetherSX2 is ready to go. You can now load your PS2 games in ISO format and start playing.
Final Thoughts
If you are serious about playing PS2 games on your phone or PC, then setting up the AetherSX2 BIOS in the right way is a big step you should not skip. I suggest you always use a trusted BIOS file, either from your own console or from our website, so your emulator runs smoothly and your games work without bugs.